
MSF Community Scanning
a11y.text MSF Community ScanningScanning is an essential part of penetration testing. Often times, attackers go straight into exploitation as they have already obtained the IP address range used by the organization. This is a critical mistake as they have not discovered all of the live hosts or open services. Continuing a penetration test without having a solid understanding all of the live hosts, open services and operating systems being used in the environment will often result in the crash of many production systems. Clearly, we’d like to avoid having to explain to the CIO or CISO how we crashed multiple production systems.
Scanning with Metasploit Community Edition
a11y.text Scanning with Metasploit Community EditionLet us take a look at how Metasploit Community Edition helps us with this critical phase:
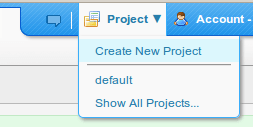
- First, let us create a new project by clicking on ‘Project’ and then on ‘Create New Project’ as follows:
- Please note that we are only required to provide a ‘Project Name’, but we will also provide the ‘Description’ and ‘Network Range’ as follows:

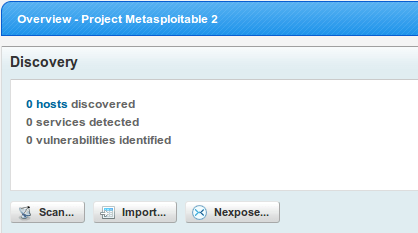
- Now that the project has been successfully created, we can begin our scan by clicking on ‘Scan’ as follows:
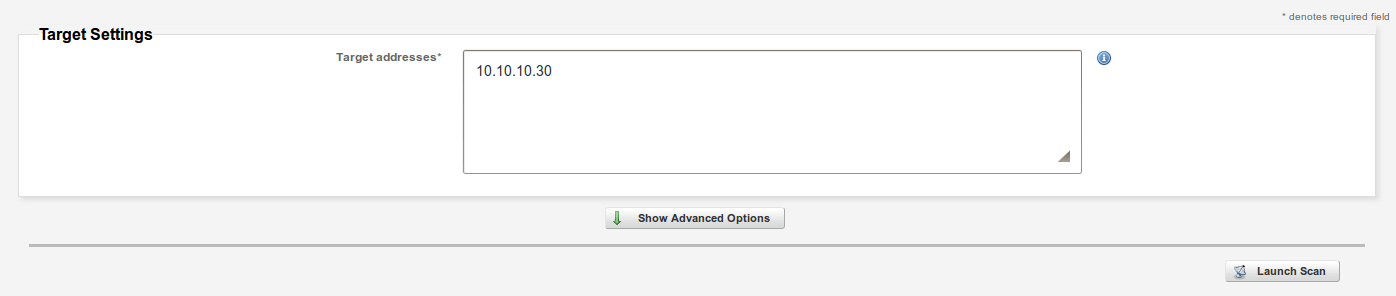
- Confirm IP address range being scanned, configure advanced options such as hosts to exclude or special NMAP switches, and then click on ‘Launch Scan’ when ready:
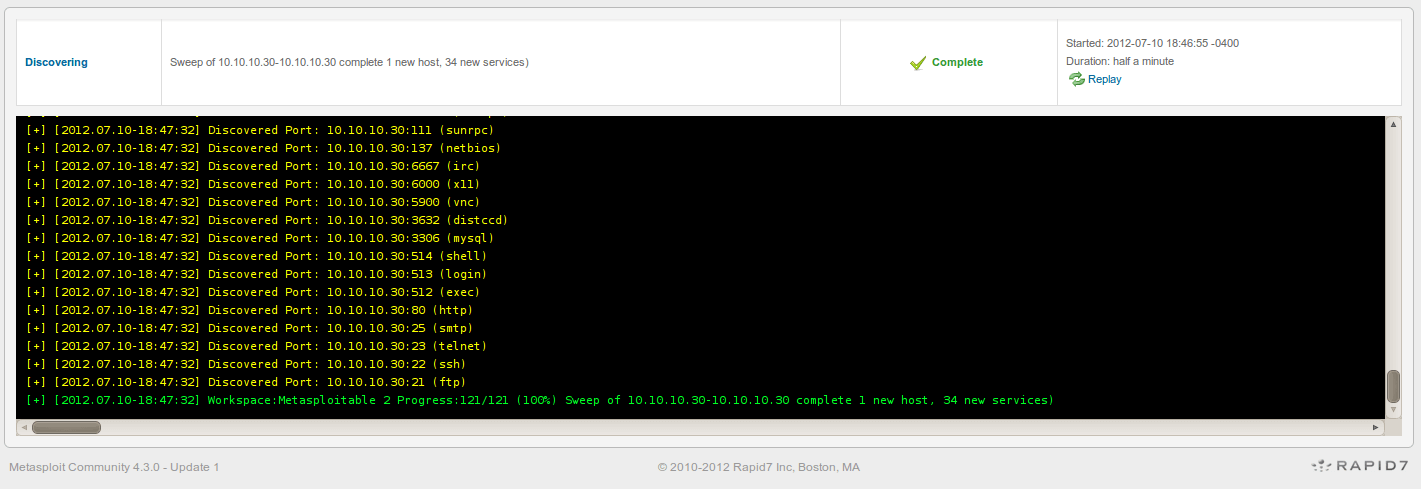
- Sit back, relax and look at how different services are discovered as the scan progresses:
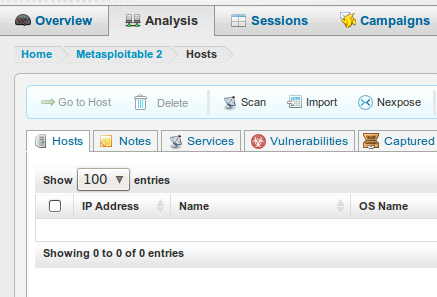
- Once the scan is complete, you can examine the results by clicking on ‘Analysis’ and then on ‘Hosts’ as follows:
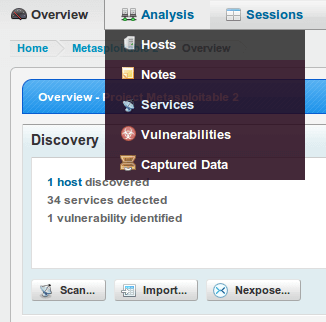
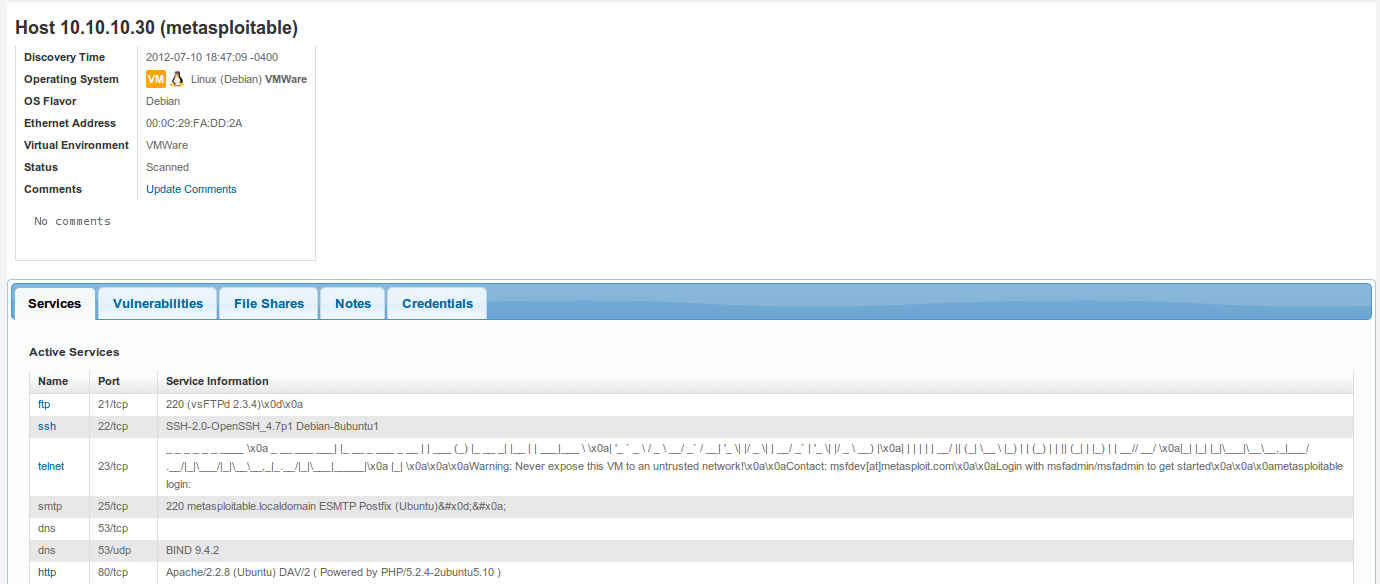
- Click on the IP address or host to obtain more information:

- Clicking on the host or IP address displays additional information about the host such as the list of open ports, service information, and so forth. Notice that you have additional tabs such as ‘Vulnerabilities’, ‘File Shares’, ‘Notes’, and ‘Credentials’. Clicking on each tab provides additional information that may be useful during a penetration test.
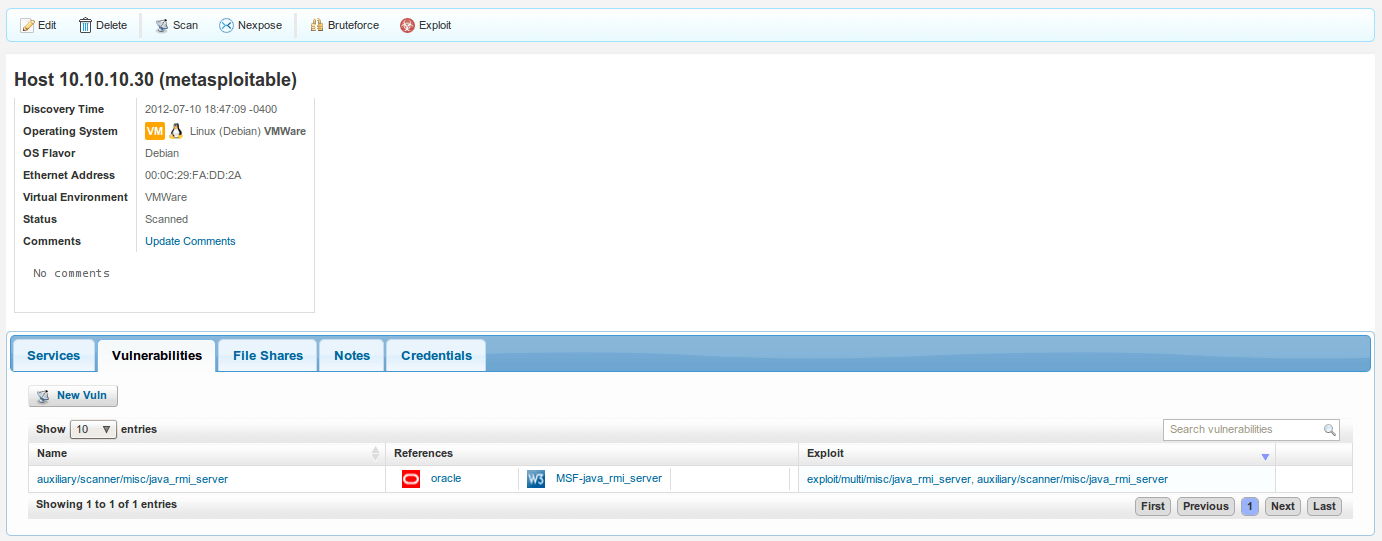
- Exploring a different tab shows us this target is vulnerable to the following vulnerability:
Armed with this information, an attacker can now proceed to the next step: Exploitation!
Importing Scan Results from Nessus
a11y.text Importing Scan Results from NessusImporting scan results from Nessus, Nexpose, and other vulnerability scanners simplies our lives as penetration testers. Let us explore this process in more detail:
-
First, we begin the process by running a Nessus scan on Metasploitable 2. To add a new scan,
Open your browser to https://127.0.0.1:8834 simply click on ‘Scan’ and then on ‘Add’ as follows:

- We then configure our desired options, and click on ‘Launch Scan’ when ready. For simplicity, we are only scanning (1) machine.
- The scan begins to run:

- Clicking on the name of the scan takes us to another section where we can observe updates in real time:

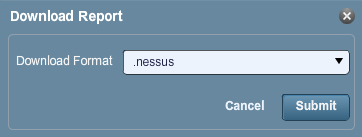
- Once the scan is complete, we can click on ‘Download Report’ to download a copy and save it locally:
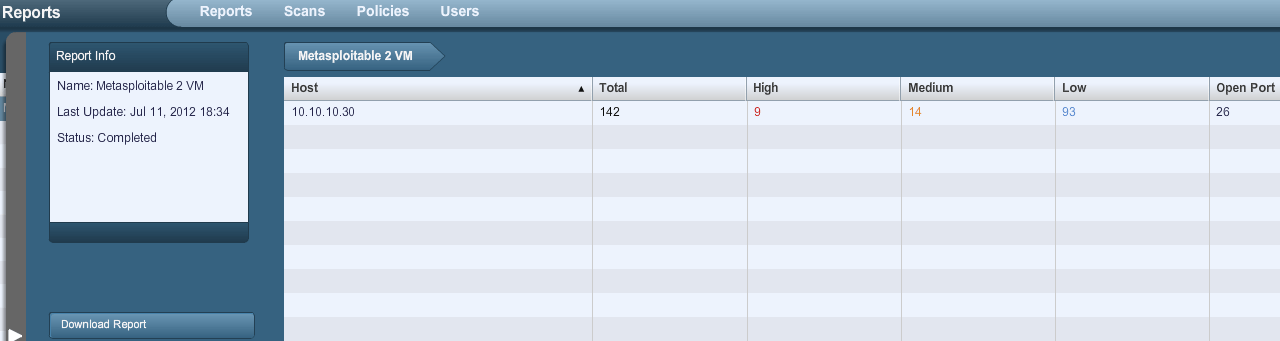
- For simplicity, we will save the report as a standard .nessus report. Other options include html, and so forth.
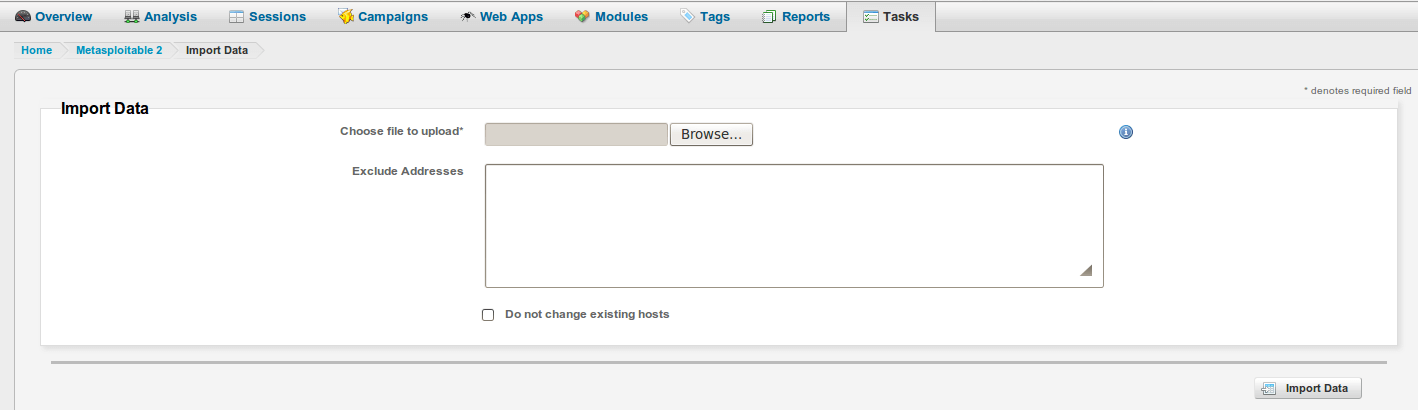
- We now turn to the Metasploit Community Edition web interface. Let us click on ‘Analysis’ and then on ‘Import’ as follows:
- Let us click on ‘Browse’ and look for our Nessus report. Please note that if necessary, you can exclude certain IP addresses from being imported altogether.
- Once it’s found, let’s click on ‘Open’ as follows:

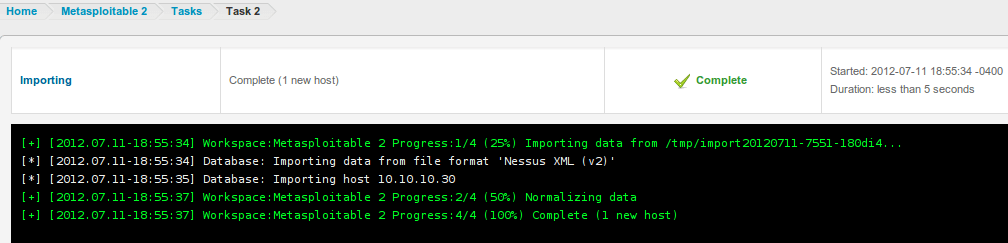
- Let us click on ‘Import Data’ to begin the data import process:

- Data import process is then started, and all data is imported into the Metasploit Community Edition.
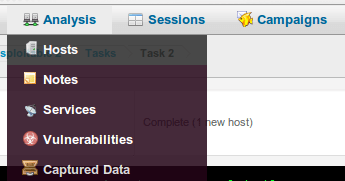
- Once again, let’s click on ‘Analysis’ and then on ‘Hosts’ as follows:
- Notice how the number of vulnerabilities is now presented to us.

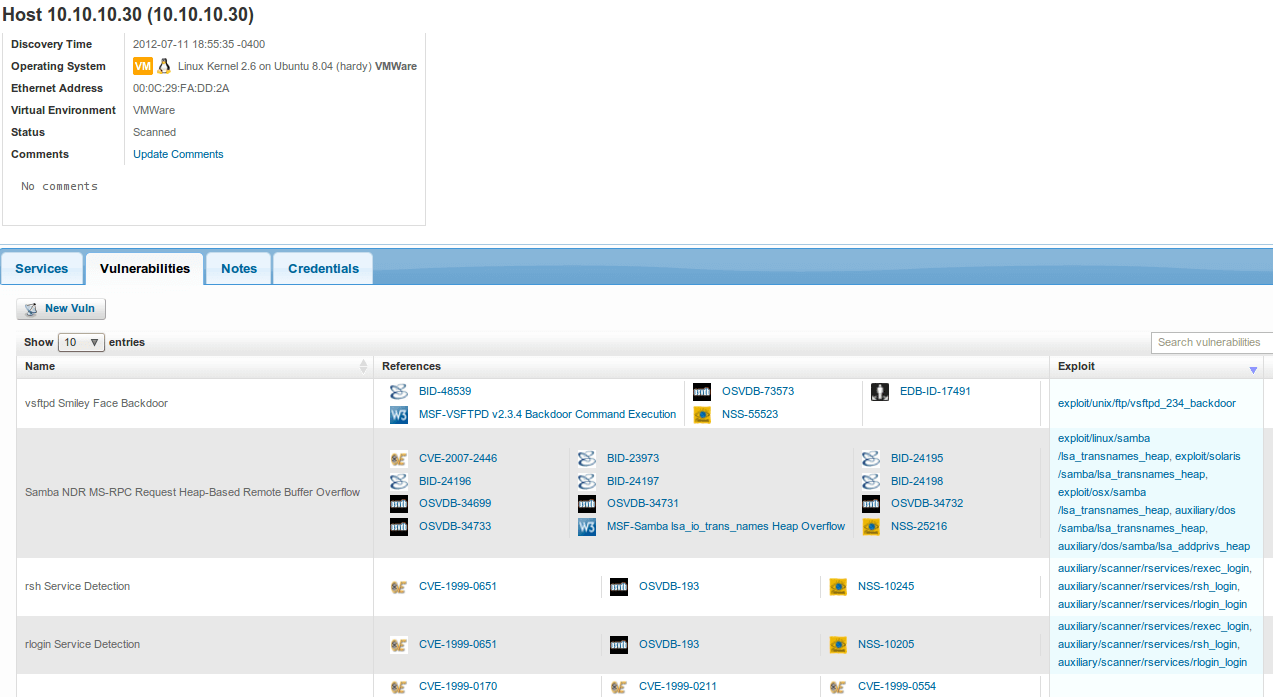
- Let’s click on the host or IP address in order to obtain more information. Notice how clicking on the ‘Vulnerabilities’ tab displays all vulnerabilities associated with this host including CVEs and applicable exploits. Isn’t this amazing?
We are now one step closer to successful exploitation!
Integration with NeXpose
a11y.text Integration with NeXposeMetasploit Community Edition has a seamless integration with NeXpose. As penetration testers, we are often looking for shortcuts and this integration is just beautiful. Let’s take a closer look.
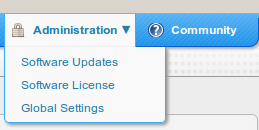
- First, let us integrate NeXpose into Metasploit Community Edition. We can accomplish this by clicking on ‘Administration’ and then on ‘Global Settings’ as follows:
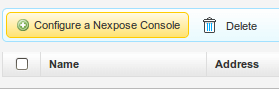
- Scroll down and click on ‘Configure a NeXpose Console’ as follows:
- Configure the NeXpose Console accordingly, and then click on ‘Save’ as follows:

- Console has now been fully configured and is ready to be used:

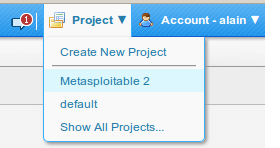
- Let’s go back to ‘Projects’, and click on ‘Metasploitable 2’ as follows:
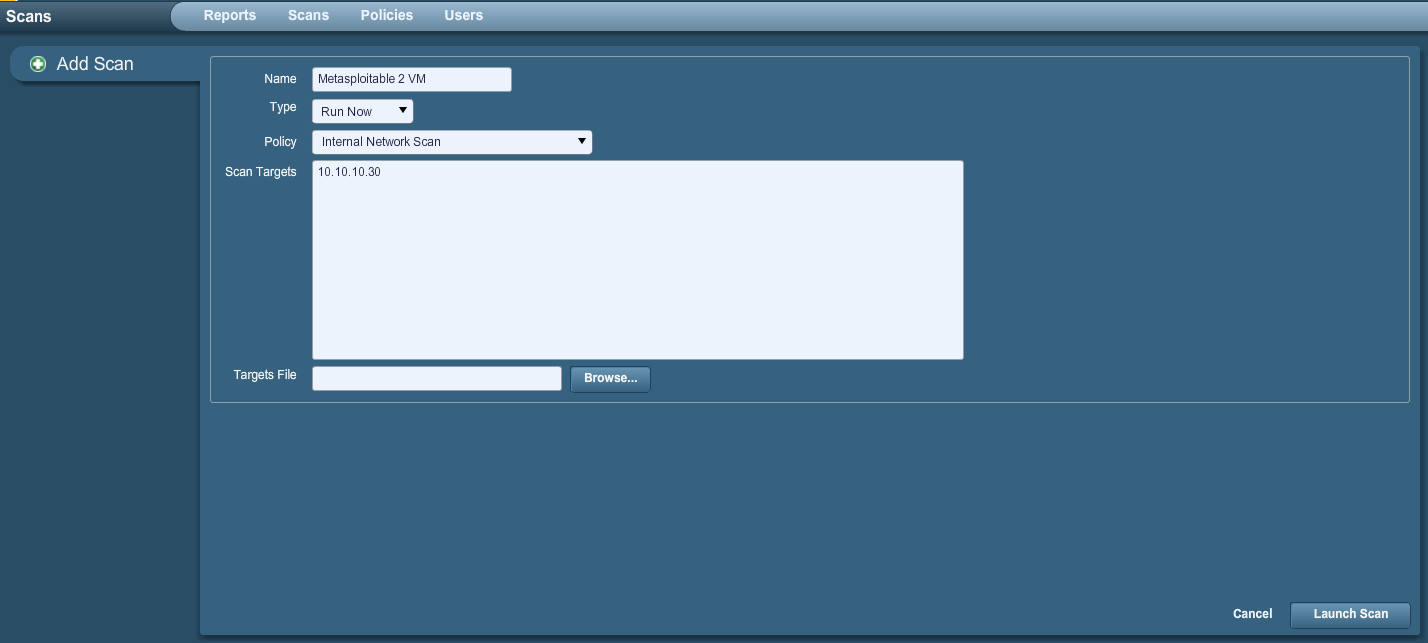
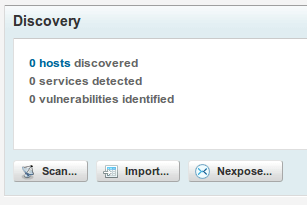
- Once the project is loaded, click on ‘Nexpose’ in the ‘Discovery’ section as follows:
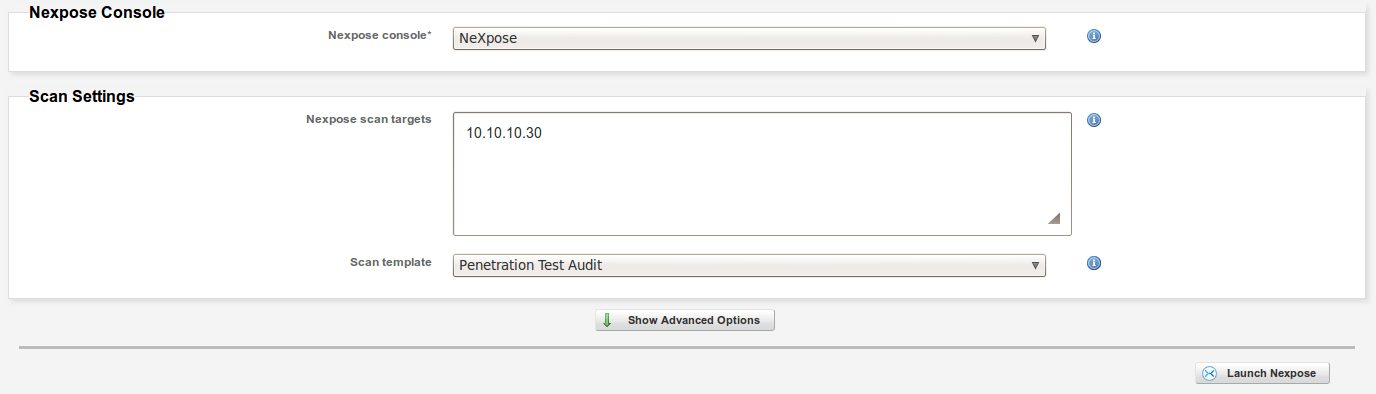
- Select the appropriate Console, the Target Range, Scan Template and Advanced Options, and when you are ready click on ‘Launch Nexpose’ as follows:
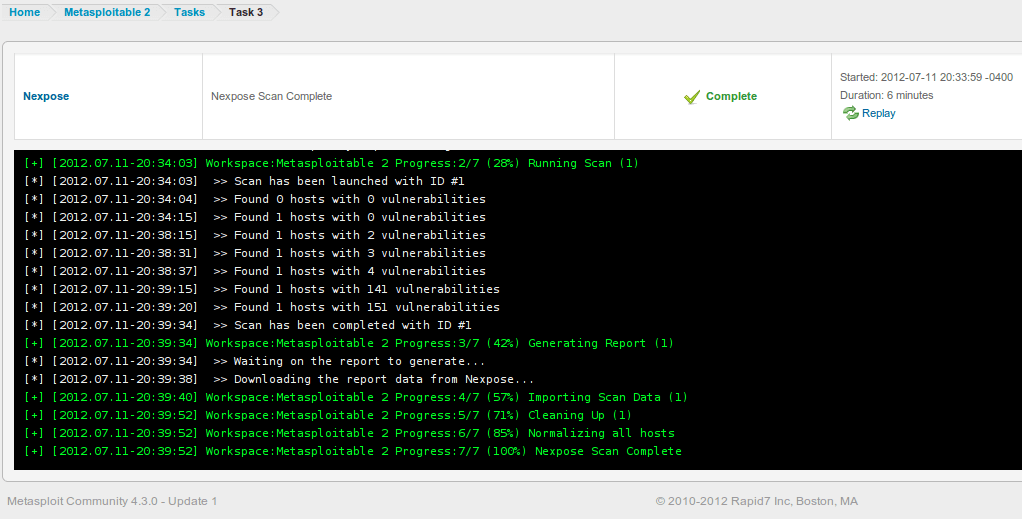
- Scan is now in progress, notice how you are able to see how vulnerabilities are discovered in real time.
- Once the scan is complete, you can examine the results by clicking on ‘Analysis’ and then on ‘Hosts’ as follows:
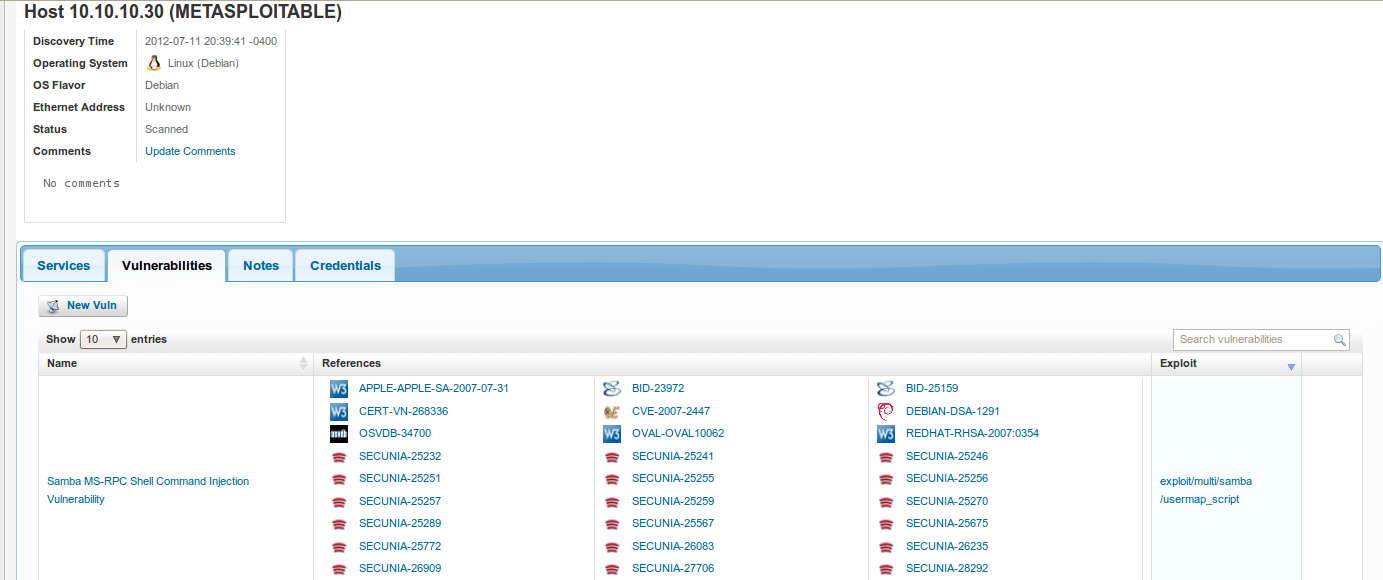
- Notice how the number of vulnerabilities is now presented to us.

- Let’s click on the host or IP address in order to obtain more information. Notice how clicking on the ‘Vulnerabilities’ tab displays all vulnerabilities associated with this host including CVEs and applicable exploits. Isn’t this amazing?
And now the part we have all been waiting for: Exploitation!