

Aug 11, 2020
Creating Kali i3-gaps
i3 is a tiling window manager for Linux and BSD systems. In this blog post, Arszilla gives a walk through on how he created his custom Kali i3-gaps ISO.
![]() OffSec Team
OffSec Team
This guest post was originally published on August 3, 2020 and has been republished with consent from the author.
Introduction
I’ve been using Linux since early 2016. It all started with my good old reliable HP Pavilion g6-1246ee & Xubuntu. After using Xubuntu for a while, I started to try out other desktop environments and window managers to find my ideal desktop environment and window manager. During this journey, I discovered tiling window managers and i3-gaps around late 2017 when I tried out Manjaro for the first time. I don’t ever recall having that laptop be so efficient, so productive and so easy to use during my 7 years with it.
When I was getting started in infosec and started using Kali Linux I tried moving my dotfiles and setup over to Kali but had a little bit of a tough time due to the packages I’ve previously used being not available in Kali repositories or being named something else when compared to their Manjaro/AUR counterpart. This was time consuming and painful to set up every time I ran Kali on a brand new system or a virtual machine. I made it more tolerable by making a script that installed the dependencies and cloned the dotfiles from a repository I set up, that way I could easily get going on a new machine if I needed to do so.
Around late summer 2019, I met TJNull in The Many Hats Club. We would casually talk about infosec and games until I brought up the topic of tiling window managers and i3-gaps. He told me that he was the community manager of Offensive Security and that he was working on an i3 metapackage for Kali. From that point forward, I started to tease him by saying “hey, how’s i3 coming along?” or “hey, i3 on Kali when?” every now and then. After hearing the same sentences so often and getting constantly teased, he challenged me to do it; to walk a mile in his shoes and deliver him a fully functioning i3 on Kali. If it worked and was deployable, it would be packaged by Kali team. That point was a point of no return since one doesn’t simply back out from a challenge given out by Offensive Security’s community manager. I told him that I accepted his challenge and that I would deliver a fully pre-configured and customized Kali i3-gaps, that’d be identical to Kali XFCE.
Generating The i3-gaps ISO
Disclaimer
Here are some statistics regarding this project:
- Over 30+ ISOs were built, each ISO downloading over 20+ GB of files; 600+ GB in total
- Over 30+ VMs were created, each VM taking over 10+ GB; 300+ GB in total
With that being said, during my tests, I’ve noticed that the order of operations during the build process is the following:

As a result, some of the stuff I might say or do may be from my trial & error experience. Thus I may not be able to pinpoint it to some documentation and justify my reasoning.
Examining Live-Build-Config
I first began by cloning Kali’s live-build-config and taking a look at the directory using [ccie]tree[/ccie]:
[cce]$ git clone https://gitlab.com/kalilinux/build-scripts/live-build-config.git
$ cd live-build-config/
$ sudo apt install -y tree
$ tree -a
.
├── auto
│ ├── clean
│ └── config
├── build_all.sh -> build.sh
├── build.sh
├── kali-config
│ ├── common
│ │ ├── bootloaders
│ │ │ └── grub-pc
│ │ │ ├── config.cfg
│ │ │ ├── dejavu-bold-14.pf2
│ │ │ ├── dejavu-bold-16.pf2
│ │ │ ├── grub.cfg
│ │ │ ├── live-theme
│ │ │ │ └── theme.txt
│ │ │ ├── splash.png
│ │ │ └── theme.cfg
│ │ ├── hooks
│ │ │ └── live
│ │ │ ├── accessibility-menu.binary
│ │ │ ├── forensic-menu.binary
│ │ │ ├── kali-hacks.chroot
│ │ │ └── persistence-menu.binary
│ │ ├── includes.binary
│ │ │ └── isolinux
│ │ │ ├── splash.png
│ │ │ └── stdmenu.cfg
│ │ ├── includes.chroot
│ │ │ ├── etc
│ │ │ │ └── live
│ │ │ │ └── config.conf.d
│ │ │ │ └── kali.conf
│ │ │ └── usr
│ │ │ └── lib
│ │ │ └── live
│ │ │ └── config
│ │ │ ├── 0031-kali-password
│ │ │ └── 1165-fix-openssh-server
│ │ ├── includes.installer
│ │ │ ├── preseed.cfg
│ │ │ └── usr
│ │ │ └── lib
│ │ │ └── live-installer.d
│ │ │ └── unhold
│ │ ├── package-lists
│ │ │ ├── firmware.list.chroot
│ │ │ ├── kali.list.binary
│ │ │ ├── linux-headers.list.chroot
│ │ │ └── standard.list.chroot
│ │ └── preseed
│ │ └── kali.cfg.chroot
│ ├── installer-default
│ │ └── packages
│ ├── installer-netinst
│ │ └── packages
│ ├── variant-default -> variant-xfce
│ ├── variant-e17
│ │ ├── hooks
│ │ │ └── live
│ │ │ └── tweak-enlightenment-config.chroot
│ │ ├── includes.chroot
│ │ │ └── usr
│ │ │ └── share
│ │ │ └── enlightenment
│ │ │ └── data
│ │ │ └── backgrounds
│ │ │ └── kali-wallpaper_1920x1200.edj
│ │ └── package-lists
│ │ └── kali.list.chroot
│ ├── variant-gnome
│ │ └── package-lists
│ │ └── kali.list.chroot
│ ├── variant-i3wm
│ │ └── package-lists
│ │ └── kali.list.chroot
│ ├── variant-kde
│ │ └── package-lists
│ │ └── kali.list.chroot
│ ├── variant-large
│ │ └── package-lists
│ │ └── kali.list.chroot
│ ├── variant-light
│ │ └── package-lists
│ │ └── kali.list.chroot
│ ├── variant-lxde
│ │ └── package-lists
│ │ └── kali.list.chroot
│ ├── variant-mate
│ │ └── package-lists
│ │ └── kali.list.chroot
│ ├── variant-minimal
│ │ └── .empty
│ └── variant-xfce
│ └── package-lists
│ └── kali.list.chroot
├── README.md
└── simple-cdd
├── disc-end-hook
├── profiles
│ ├── default.downloads -> /usr/share/simple-cdd/profiles/default.downloads
│ ├── default.excludes -> /usr/share/simple-cdd/profiles/default.excludes
│ ├── default.packages
│ ├── default.preseed -> ../../kali-config/common/includes.installer/preseed.cfg
│ └── default.udebs
└── simple-cdd.conf
56 directories, 51 files
[/cce]
At first glance, I was terrified that there were a lot of files and directories. This was because I was yet to read Kali’s documentation for live building a custom Kali ISO. After reading the documentation and doing some research I realized that majority of this project was going to take place under these 5 directories:
[cce].
└── kali-config
├── common
│ ├── hooks
│ └── includes.chroot
└── variant-i3_gaps
[/cce]
With an idea of what I have to do, I decided to get started by managing and installing packages.
Managing and Installing Packages
Before I began to manage and install the packages that I’d need in my build, I had to create my variant. As a result I copied [ccie]variant-xfce[/ccie] and renamed it to [ccie]variant-i3_gaps[/ccie] and deleted the other variants since I didn’t need them nor wanted to have unnecessary clutter in my project. Afterwards, I opened up [ccie]kali-config/variant-i3_gaps/package-lists/kali.list.chroot[/ccie] in a text editor. Since I copied my [ccie]kali.list.chroot[/ccie] off of [ccie]variant-xfce[/ccie], it looked like this:
[cce]# You always want those
kali-linux-core
kali-desktop-live
# Kali applications
#<package>
# You can customize the set of Kali metapackages (groups of tools) to install
# For the complete list see: https://tools.kali.org/kali-metapackages
kali-linux-default
# kali-linux-large
# kali-linux-everything
# kali-tools-top10
# Graphical desktop
kali-desktop-xfce
[/cce]
Since [ccie]i3-gaps[/ccie], [ccie]i3lock-color[/ccie], and [ccie]multilockscreen[/ccie] weren’t readily available in Kali repositories (as of the time I’m writing this), I had to find their dependencies’ Debian counterparts in order to build them. After gathering the dependencies from their Github repositories, my [ccie]kali.list.chroot[/ccie] looked like this:
[cce]# Kali
kali-desktop-i3
kali-desktop-live
kali-linux-core
kali-linux-default
# i3-gaps
dh-autoreconf
gcc
libev-dev
libpango1.0-dev
libstartup-notification0-dev
libxcb-cursor-dev
libxcb-icccm4-dev
libxcb-keysyms1-dev
libxcb-randr0-dev
libxcb-shape0
libxcb-shape0-dev
libxcb-util0-dev
libxcb-xinerama0-dev
libxcb-xkb-dev
libxcb-xrm-dev
libxcb-xrm0
libxcb1-dev
libxkbcommon-dev
libxkbcommon-x11-dev
libyajl-dev
make
xcb
# i3lock-color
libcairo-dev
libfontconfig-dev
libjpeg-dev
libpam-dev
libx11-xcb-dev
libxcb-composite0
libxcb-composite0-deva
bc
feh
imagemagick
x11-xserver-utils
# Networking
network-manager
network-manager-gnome
# Audio
alsa-utils
libpulse0
pavucontrol
pulseaudio
# Programs and Tools
arandr
compton
git
htop
lightdm
lxappearance
nitrogen
numlockx
pcmanfm
ranger
rofi
rxvt-unicode
scrot
sxiv
xfce4-power-manager
[/cce]
[ccie]kali-desktop-i3[/ccie] was made by TJNull and has 3 packages in it; [ccie]i3[/ccie], [ccie]conky[/ccie] and [ccie]suckless-tools[/ccie]. The majority of the programs and tools I chose are lightweight counterparts of other tools. For example [ccie]sxiv[/ccie] is a lightweight alternative to [ccie]imagemagick[/ccie] with vim-esque controls.
With the packages ready, the next step was utilizing hooks.
Utilizing Hooks
Since [ccie]i3-gaps[/ccie], [ccie]i3lock-color[/ccie], and [ccie]multilockscreen[/ccie] are not available in Kali repos, I had to build them, but I had no idea how I would build them. Then I noticed the subsection in Kali’s documentation titled Build Hooks, Binary and Chroot
Live-build hooks allows us to hook scripts in various stages of the Kali ISO live build. For more detailed information about hooks and how to use them, refer to the live build manual. As an example, we recommend you check out the existing hooks in [ccie]kali-config/common/hooks/[/ccie].
Visiting the live build manual revealed more information about hooks:
Hooks allow commands to be run in the chroot and binary stages of the build in order to customize the image. Depending on whether you are building a live image or a regular system image you have to place your hooks in [ccie]config/hooks/live[/ccie] or [ccie]config/hooks/normal[/ccie] respectively.
In other words, the hooks placed in [ccie]config/hooks/live[/ccie] or [ccie]config/hooks/normal[/ccie] execute scripts inside the ISO’s OS, and not in the host machine that’s building the ISO. Since [ccie]./kali-config/hooks/live[/ccie] was already there, I decided to take a look at the pre-existing hooks made by Kali to get an idea of what my hooks should look like. At that point, I realized that I can either run bash scripts or run commands as long as I placed a shebang at the top of the script. That resulted in me creating 3 hooks:
- [ccie]i3-gaps.hook.chroot[/ccie]
- [ccie]i3lock-color.hook.chroot[/ccie]
- [ccie]pulseaudio.hook.chroot[/ccie]
Instead of installing [ccie]multilockscreen[/ccie] in this stage, I decided to do it in the next stage; which I will explain my reasoning later on.
With what I read about hooks, I copied the building instructions for [ccie]i3-gaps[/ccie] from Github to [ccie]i3-gaps-hook.chroot[/ccie]:
[cce]#!/bin/sh
git clone https://www.github.com/Airblader/i3 i3-gaps
cd i3-gaps/
autoreconf –force –install
rm -rf build/
mkdir -p build && cd build/
../configure –prefix=/usr –sysconfdir=/etc –disable-sanitizers
make
make install
cd ../..
rm -rf i3-gaps
[/cce]
At the end of the hook, I had to remove the [ccie]i3-gaps[/ccie]’ folder post-installation because otherwise, it ended up being present in [ccie]/[/ccie] of the ISO. For [ccie]i3lock-color[/ccie] I followed the same procedure:
[cce]#!/bin/sh
git clone https://github.com/Raymo111/i3lock-color.git
cd i3lock-color/
autoreconf –force –install
./configure
make
make install
cd ..
rm -rf i3lock-color
[/cce]
Lastly, I had [ccie]pulseaudio.hook.chroot[/ccie]. The reason behind why I have this hook is because of an audio issue I came across during my tests; where I noticed that despite my [ccie]i3-gaps[/ccie]’ config stating that audio levels should [ccie]±5%[/ccie] when the [ccie]XF86AudioRaiseVolume[/ccie] or [ccie]XF86AudioLowerVolume[/ccie] (AKA the volume control buttons) were pressed; the audio levels moved oddly. For example, the volume was maxed out on [ccie]88%[/ccie] (instead of [ccie]100%[/ccie]) according to [ccie]i3status[/ccie] and [ccie]alsamixer[/ccie]. To fix this; [ccie]pulseaudio.hook[/ccie] runs [ccie]pulseaudio[/ccie] in a verbose state for 15 seconds, then removes its cookie to clear up [ccie]pulseaudio[/ccie].
[cce]#!/bin/sh
timeout 15 pulseaudio -vvv
rm -rf .pulse-cookieaa
[/cce]
With hooks installing everything we needed for the system, the last step I had to do was to place files on the system.
Placing Files On The System
After getting everything ready to be installed, the last step was to place the essential files and dotfiles that would get the system to look good and look like Kali. These were:
- Placing [ccie]multilockscreen[/ccie] and [ccie]i3exit[/ccie] to [ccie]/usr/bin[/ccie]
- Placing the dotfiles for the user and root
The reason I am installing [ccie]multilockscreen[/ccie] in this stage rather than the hooks stage is that because even if I was to install it during the hooks stage, the hook would clone the Github repo, move a single bash script to [ccie]/usr/bin[/ccie] and then delete the folder. As a result, I decided to do it “manually” since the script was a dependency for [ccie]i3exit[/ccie] which handled actions like locking, suspending, restarting the system.
To get an idea on how can I place my files on the system, I decided to take a look at Overlaying Files In Your Build subsection from Kali’s documentation, which said the following:
You have the option to include additional files or scripts in your build by overlaying them on the existing filesystem, inside the [ccie]includes.{chroot,binary,installer}[/ccie] directories, respectively. For example, if we wanted to include our own custom script into the /root/ directory of the ISO (this would correspond to the “chroot” stage), then we would drop this script file in the [ccie]kali-config/common/includes.chroot/[/ccie] directory before building the ISO.
After reading the last sentence it was clear that all I had to do was place the files in [ccie]./kali-config/common/includes.chroot/[/ccie]. As a result I created [ccie]./kali-config/common/includes.chroot/usr/local/bin[/ccie] where I placed [ccie]multilockscreen[/ccie] and [ccie]i3exit[/ccie].
Originally, if [ccie]multilockscreen[/ccie] was a hook, I’d have to clone the Github repo, move the bash script to [ccie]/usr/local/bin/multilockscreen[/ccie] and then delete the folder. Instead, I decided to play “safe” as this script was a necessity for [ccie]i3exit[/ccie].
[ccie]i3exit[/ccie] is a helper script from Manjaro’s i3-gaps. The script handles system modes (i.e. lock, exit, switch users, suspend, hibernate, reboot, and shutdown). The only difference between my [ccie]i3exit[/ccie] and Manjaro’s [ccie]i3exit[/ccie] is that I changed [ccie]i3lock[/ccie] with [ccie]multilockscreen[/ccie].
With [ccie]multilockscreen[/ccie] and [ccie]i3exit[/ccie] in place, the final part of this stage was installing the dotfiles. With Kali’s 2020.1 update, non-root user became the new standard for Kali. As a result, in order for me to populate [ccie]$HOME[/ccie] of any given user, I had to create [ccie]./kali-config/common/includes.chroot/etc/skel[/ccie] where any placed file there would be transferred over to [ccie]/etc/skel[/ccie] in the actual system, which then would populate the [ccie]$HOME[/ccie] directory of any new user. After creating this directory, I placed the following files:
[cce].bashrc
.gtkrc-2.0
.Xresources
.config/compton/compton.conf
.config/dunst/dunstrc
.config/gtk-3.0/settings.ini
.config/i3/config
.config/i3status/i3status.conf
.config/libfm/libfm.conf
.config/mimeapps.list
[/cce]
In these dotfiles, the changes in
- [ccie].Xresources[/ccie]
- [ccie].gtkrc-2.0[/ccie]
- [ccie].config/dunst/dunstrc[/ccie]
- [ccie].config/gtk-3.0/settings.ini[/ccie]
- [ccie].config/i3status/i3status.conf[/ccie]
were made to match the Kali 2020.1’s appearance; whether it be the icons, terminal or system-wide colors. However the changes in:
- [ccie].config/i3/config[/ccie]
- [ccie].config/libfm/libfm.conf[/ccie]
- [ccie].config/mimeapps.list[/ccie]
were all quality of life improvements. For example, [ccie].config/i3/config[/ccie] has more keybinds and gaps enabled by default compared to the default config. The change in [ccie]libfm.conf[/ccie] changed the default terminal for [ccie]pcmanfm[/ccie] to [ccie]rxvt-unicode[/ccie] and the changes in [ccie]mimeapps.list[/ccie] changed some of the default applications; mainly the default browser, image viewer, and PDF viewer.
With everything being in place for the user, the last step was to copy files in [ccie]./kali-config/common/includes.chroot/etc/skel[/ccie] to [ccie]./kali-config/common/includes.chroot/root[/ccie]. That way, the root user would also have the same dotfiles as the normal user.
With the files in place, it was time to build the ISO.
Building The ISO
After putting every piece of the puzzle in its place, it was time that I built the ISO. To start building the ISO I had to install a few dependencies on my Kali, then run the build script.
[cce]$ sudo apt install -y curl git live-build cdebootstrap
$ ./build.sh –variant-i3gaps –verbose
[/cce]
The script ran for approximately 40 minutes; @ 92.92 Mbps download and 4.12 Mbps upload. When the script was done, the final product was placed in [ccie]./images[/ccie].
Taking a Look At The Final Product
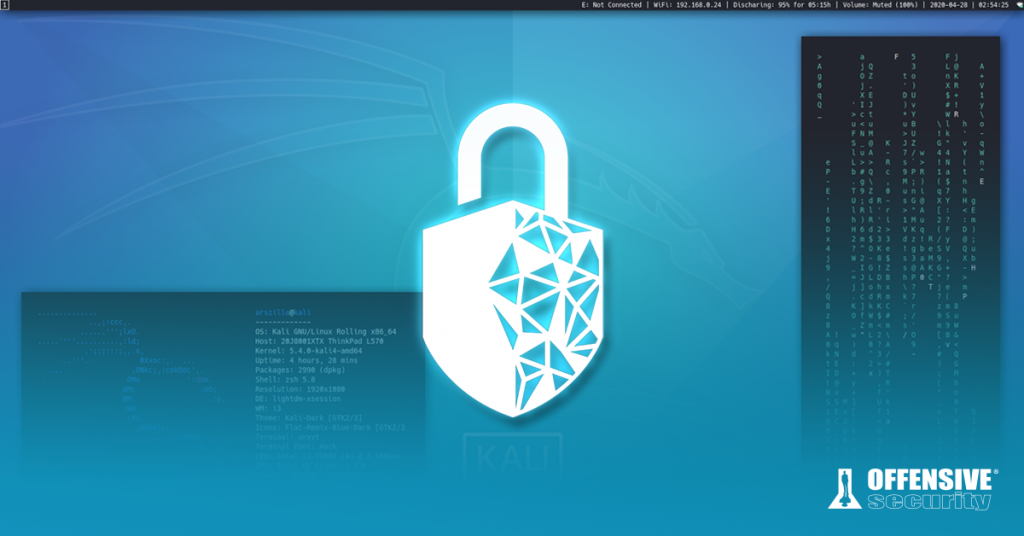
After burning the ISO from [ccie]./images[/ccie] to my USB, I ran the ISO on my laptop and voilà!
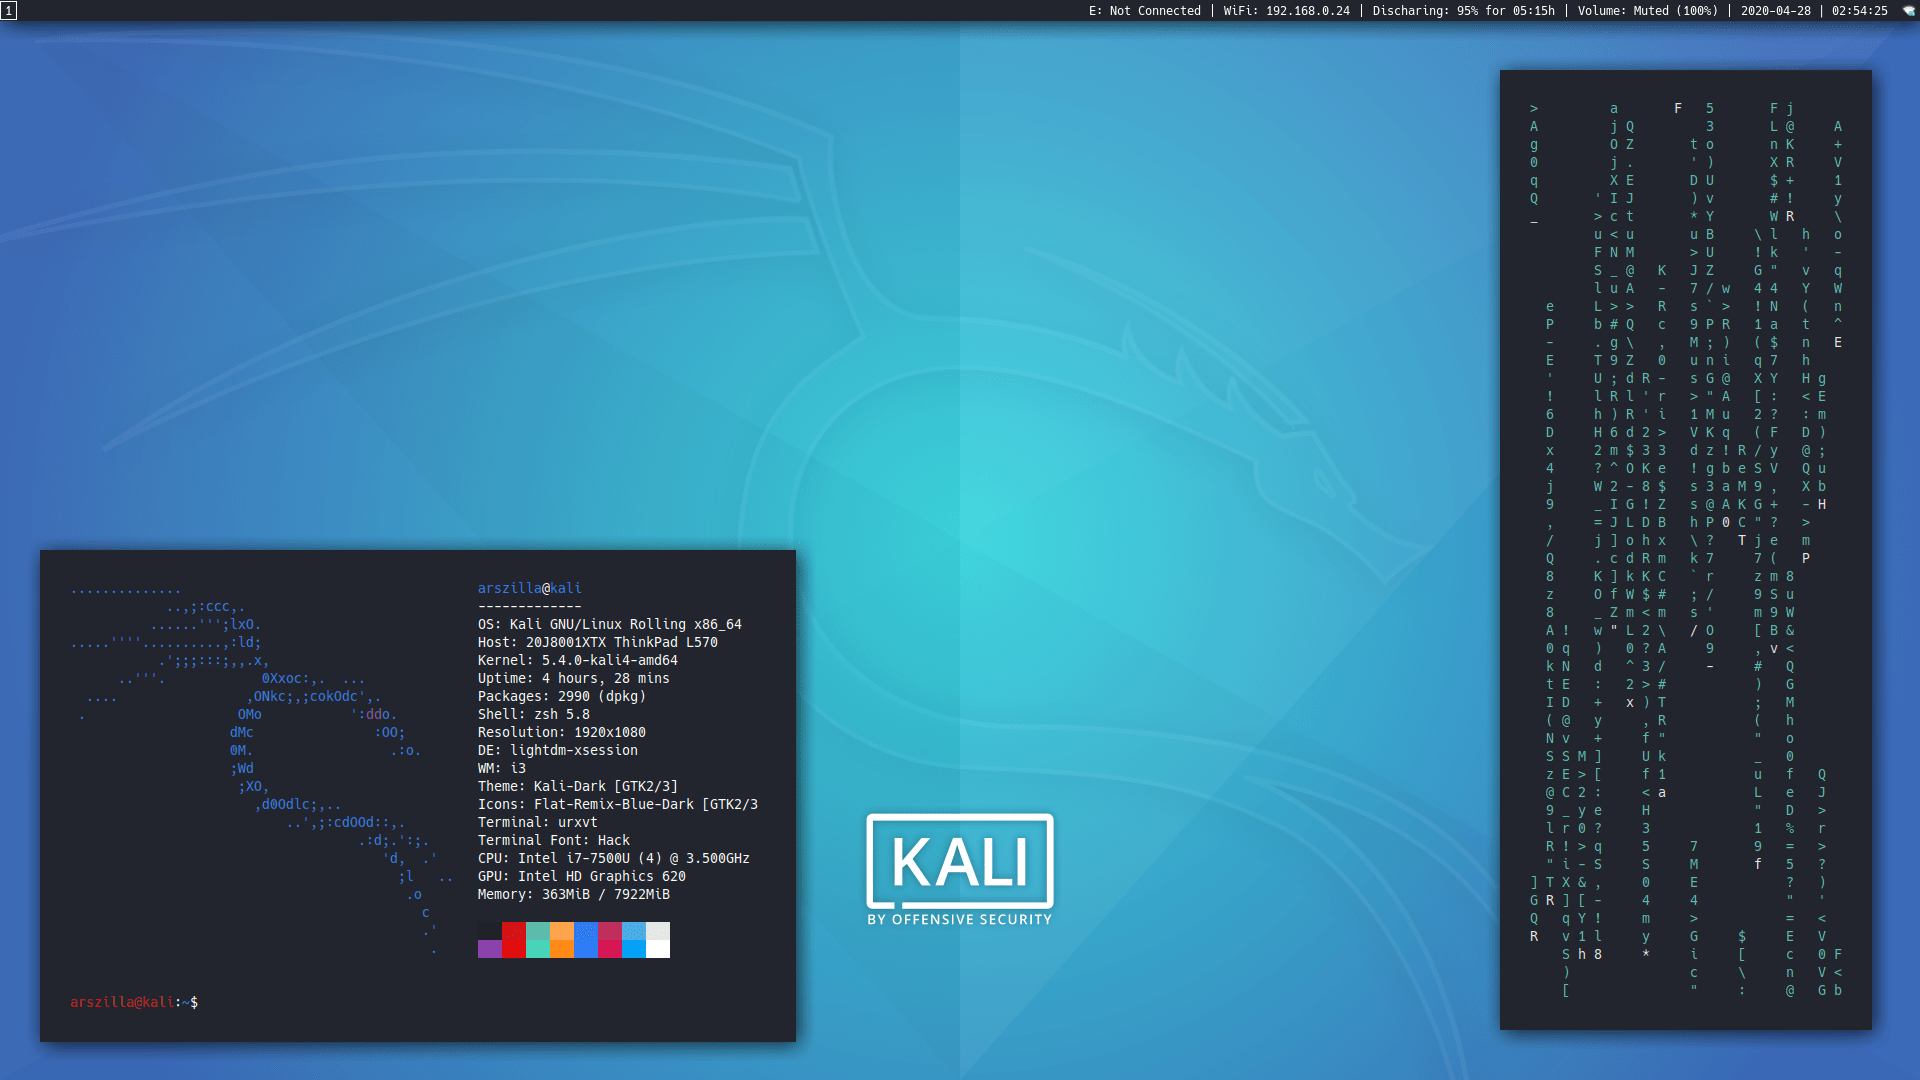
A fully functional Kali i3-gaps that is ready on-demand with no additional setup required!
Closing Words
I have to thank TJNull for such a fun challenge that ended up being an amazing learning experience as well as being my favorite project and proudest achievement so far. With that being said, none of this would’ve happened if it wasn’t for The Many Hats Club and the Kali team, so a special thanks goes out to them.
If you are interested in trying out or contributing to Kali i3-gaps, check it out over at my GitLab.
If you have any questions or issues, feel free to contact me via Twitter or via mail.
Arslan Masood (Arszilla) is a cybersecurity student that is currently focusing on pentesting, malware analysis, and OSINT. In his spare time, he enjoys competing in Capture The Flag (CTFs) competitions and collaborating with other security researchers in various projects while studying mathematics at Istanbul University.